Garage Door Weather Stripping in Hamilton, OH: Stop Drafts Before Winter
Garage Door Weather Stripping in Hamilton, OH: Stop Drafts Before Winter
If your garage feels cold in November, even with the door closed, garage door weather stripping is the first place to check. It is a set of rubber and vinyl strips that seal the gaps around your garage door, and when it fails, cold air, water, leaves, and mice get in through gaps you may not even see. In Hamilton, OH, where freeze-thaw cycles, road salt, and older concrete slabs are common, a worn seal is one of the cheapest problems to fix, and one of the most expensive to ignore.
This guide shows you how to test your seals in 5 minutes, how to tell a bottom seal from a side seal, and how to replace a bottom seal safely if it is a simple slide-in job. It also tells you when to stop, because a seal problem is sometimes a sign of a door that is unlevel, off track, or has a broken spring or cable. You do not need to touch a spring, a cable, or a bottom bracket for any check in this guide.
If your door is crooked, jammed, or will not close, or if the retainer track is bent or rusted through, skip the DIY steps and call (513) 286-7477. The 24/7 call line connects you with a local garage door company in Hamilton and Butler County, and you can ask for the price before any work starts. For a simple worn seal, start with the quick answer below.
Key Takeaways: Garage Door Weather Stripping
- Garage door weather stripping seals the bottom, sides, and top of your door against drafts, water, and pests.
- Daylight under a closed door, a draft at the floor, or cracked, flat rubber means the seal has failed.
- A standard bottom seal swap is often a sub-$50, under-an-hour DIY job, if the profile matches and the door is level.
- Stop and call (513) 286-7477 if the door is unlevel, the retainer is bent, or a spring or cable looks broken.
Quick Answer: What Is Wrong With My Garage Door Seal?
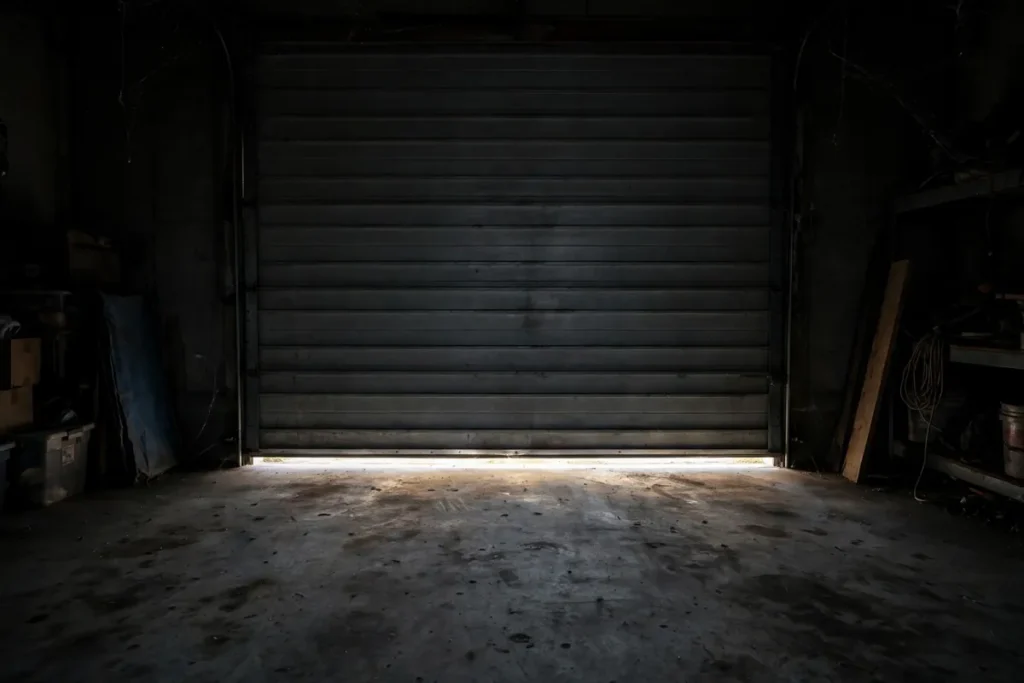
Garage door weather stripping fails when rubber cracks, flattens, or pulls away from the door or frame, leaving a gap that cold air and water use every day. The fastest test is to close the door in daylight, turn off the garage light, and look for daylight along the bottom, sides, or top. If you see light, feel a draft, or find water, leaves, or pests inside after rain, the seal is the likely cause. A bottom seal can usually be replaced by sliding the old rubber out of its retainer and sliding a matching new seal in, but only if the door sits level and the retainer is undamaged.
What Is Garage Door Weather Stripping?
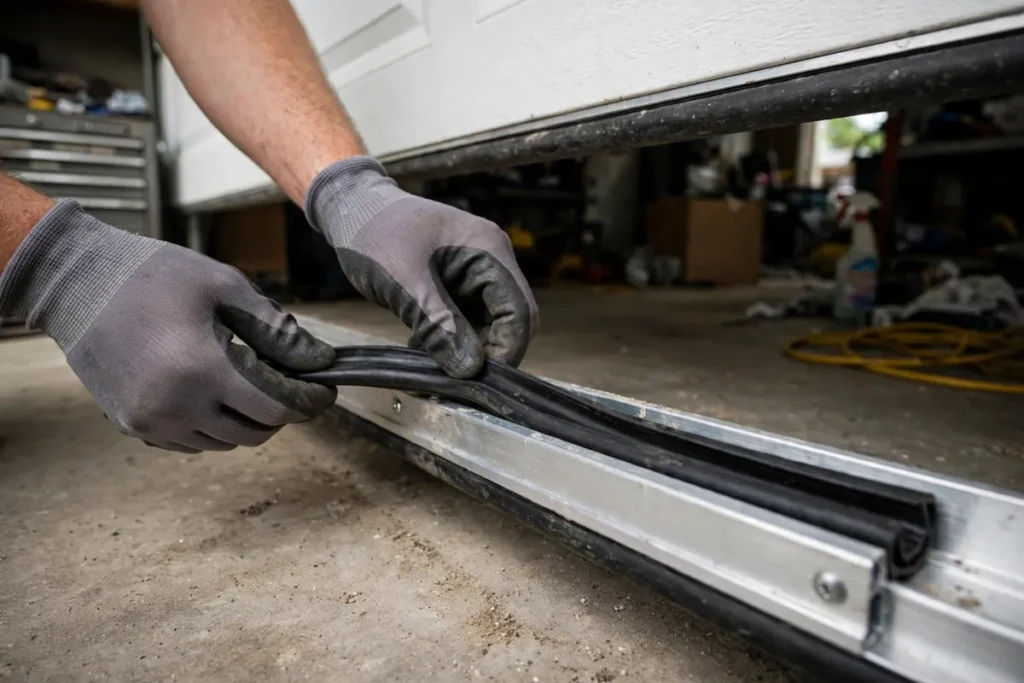
Garage door weather stripping is not one strip. It is a system of seals that work together. The bottom seal, also called an astragal, is the rubber strip along the bottom edge of the door that presses against the concrete when the door closes. Side and top weatherstripping, also called stop molding, is the vinyl strip along the frame that seals the gap between the frame and the door panels. A threshold seal is different again: it is a raised rubber strip glued to the garage floor, and the door closes against it.
Together, these seals stop drafts, shed water away from the interior, keep out dust, leaves, and pests, and help the door close quietly and evenly. Because the rubber is constantly compressed, exposed to sun, and hit by temperature swings, it is a consumable part. It is designed to be replaced, not repaired, and most bottom seals last about 3 to 7 years, with side seals often lasting longer if they are not damaged.
7 Signs Your Garage Door Weather Stripping Has Failed
You do not need special tools to spot a failed seal. Work through these signs in order, and treat any one of them as a reason to plan a replacement. Two or more means the job should jump the line, especially before the first hard freeze in Hamilton.
- Daylight around a closed door. With the door closed and the garage light off in daytime, any light along the bottom, sides, or top is a hole that air, water, and bugs use.
- A draft at the floor. On a windy day, stand inside near the closed door. If you feel moving air, or a tissue held near the threshold flutters, the seal is leaking.
- Water inside after rain or snowmelt. Damp spots, mineral stains, or puddles just inside the door point to a bottom seal that no longer sheds water.
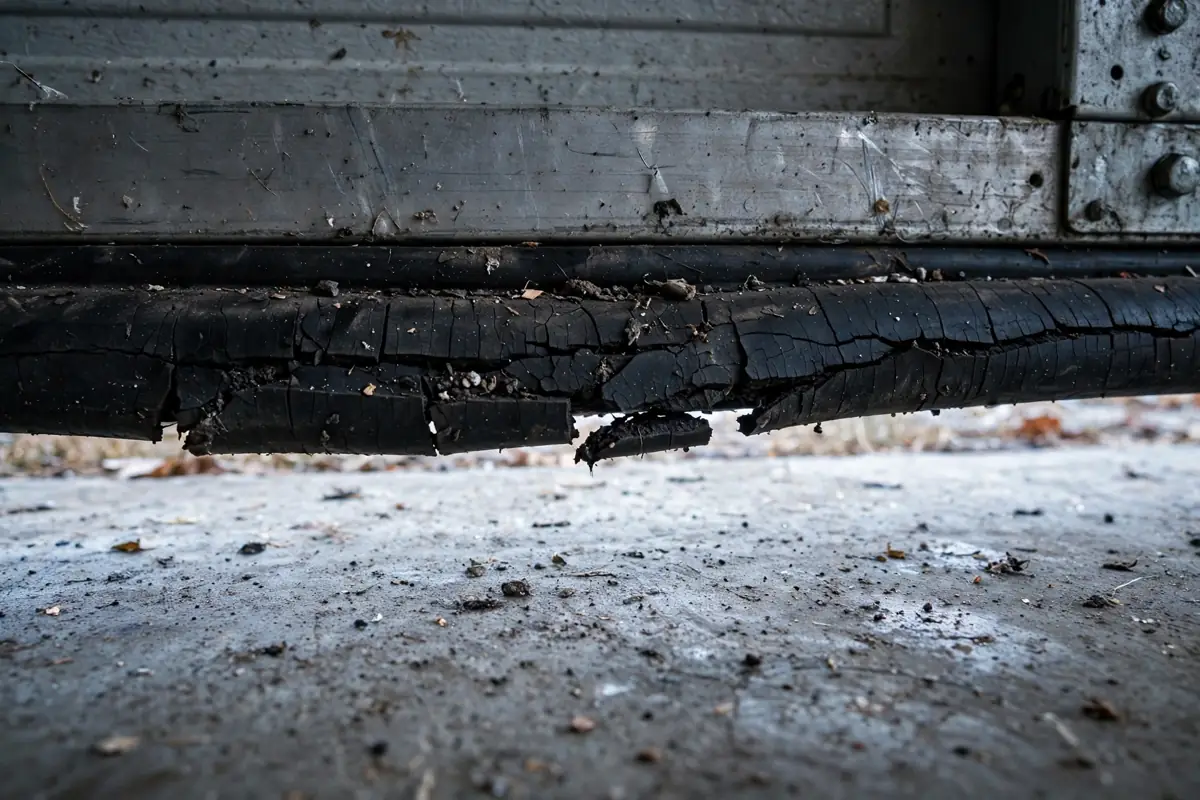
- Cracked, brittle, or flat rubber. If the rubber crumbles when you press it, has chunks missing, or stays squashed instead of springing back, it has reached the end of its life.
- Pests or debris inside. More insects, mice, leaves, or twigs blowing under the door usually means a gap has opened, even if the seal still looks intact from a distance.
- Ice or frost inside. Frost on the inside of a panel, or a bottom seal that freezes to the concrete overnight, is a sign the seal is trapping water instead of shedding it.
- Colder rooms beside or above the garage. In an attached garage, a failed seal lets cold air into a space that shares walls or a ceiling with your home, so those rooms feel colder and your heating system works harder.
Why Hamilton Winters Are Hard on Garage Door Seals
Hamilton winters attack garage door weather stripping from several directions at once. Freeze-thaw cycles are the main one: meltwater seeps into tiny cracks in the rubber, freezes, expands, and widens those cracks, and the cycle repeats through November, March, and April. Road salt and slush tracked in on tires speed up the breakdown, and salt also corrodes the aluminum retainer that holds the bottom seal.
Summer sun matters too, because UV makes rubber brittle before winter even starts. Older Hamilton homes add another problem: concrete slabs settle and heave, so a door that once sat level may now leave a gap in the middle or at one end. A standard seal cannot fix a settled slab on its own, which is why the daylight test matters. It tells you whether the gap is even, which points to the seal, or tapered, which points to a door or floor problem.
Types of Garage Door Weather Stripping
Matching the seal to your door is the single most important step in garage door weather stripping replacement. Buying the wrong profile is the most common DIY mistake, because a T-end seal will not work in a U-channel, and vice versa. Take a short sample of the old rubber with you, or photograph the end profile, before you buy.
| Seal type | Where it goes | Best for |
|---|---|---|
| Bottom seal, T-end or bulb | Bottom edge of the door, in a retainer channel | Most modern sectional doors, standard floors |
| Bottom seal, U-channel | Bottom edge, single-channel retainer | Uneven concrete, older doors |
| Side and top weatherstripping | Door frame, top and both sides | Wind and light gaps around the frame |
| Threshold seal | Garage floor, glued down | Settled slabs, water running toward the door |
| Brush seal | Frame or bottom, bristles instead of rubber | Commercial doors, or where drainage must pass |
Garage door weather stripping types: match the profile to your retainer before you buy.
For material, EPDM rubber is a strong choice for Ohio winters because it stays flexible in cold weather, resists UV, and holds its shape through freeze-thaw cycles better than standard vinyl. Vinyl is cheaper and works in milder conditions, but it cracks faster in cold. Foam tape is only a quick, temporary fix, and silicone seals last longest but cost more. For most Hamilton homes, a good EPDM or rubber bottom seal, matched to the retainer, is the sensible middle ground.
How to Check Your Garage Door Weather Stripping in 5 Minutes
- Daylight test: Close the door in daytime, turn off the garage light, and look for light along the bottom, sides, and top.
- Draft test: On a windy day, hold a tissue near the threshold and frame. If it flutters, air is leaking there.
- Thumb test: Press the bottom rubber. If it crumbles, flakes, or stays flat, it is worn out.
- Water test: After rain, look for damp spots or puddles just inside the door, and for leaves or debris blown under it.
- Level test: Look at where the light shows. Light along the whole width points to the seal. Light only in the middle points to a settled slab. A gap that tapers from one side to the other points to a door that is not level.
Do this check in fall, before the first hard freeze, and again in spring after winter has done its work. Rubber is easier to work with in milder weather, and a seal replaced in October or early November will not be fighting ice the first time it is used. If the level test shows a tapered gap, do not buy a seal yet. That pattern usually means uneven cable tension or a spring out of balance, and a new seal will not hide it for long.
How to Replace a Garage Door Bottom Seal, Step by Step
This is for a standard bottom seal swap only, on a door that sits level, with an undamaged retainer. You need a tape measure, a utility knife, pliers, a flat-head screwdriver, soapy water in a spray bottle, a rag, and the new seal. Measure the full width of the closed door, add 2 to 6 inches for trimming, and confirm the profile matches your retainer before you start.
- Make it safe: Close the door and unplug the opener, so no one can run the door while your hands are near the bottom track.
- Open the retainer ends: Back out the small screws, caps, or crimps at each end of the bottom channel, just enough to let the old seal slide out.
- Pull the old seal out: Pull steadily from one end. If it is stuck, cut it into shorter sections and pull each piece separately, without scratching the retainer.
- Clean the channel: Brush and wipe out dirt, grit, and old rubber crumbs, because grit will tear new rubber and stop it seating evenly.
- Warm and lubricate the new seal: Let cold rubber sit indoors first, then spray its edges lightly with soapy water so it slides instead of fighting you.
- Slide the new seal in: Feed the T-barb or bulb into the retainer at one end and push it across a few inches at a time, keeping it straight. A second person helps on a wide, two-car door.
- Trim and test: Leave about 1 inch past each end, trim the excess straight, replace the retainer caps, and run the door through two or three full cycles. Check for light under the door and for any section that lifts away from the floor.
After the new garage door weather stripping is in, test the door’s safety reverse as well, because a thicker new seal can change how the door meets the floor. If the door now reverses, or will not close fully, the close limit or force may need a small adjustment, and that is a job to check carefully or leave to a technician. Do not stretch the seal while installing it, because stretching thins the rubber and stops it springing back.
Side and Top Garage Door Weather Stripping
While you are at the door, check the side and top weatherstripping too, because a fresh bottom seal does little if the frame is leaking. Side weatherstripping is usually a V-strip vinyl nailed or screwed to the frame, and it takes about 15 minutes per side on a two-car door to replace. If it is brittle, separated from the frame, or visibly compressed, swap it at the same time as the bottom seal.
Top, or header, seals are trickier corner work, and they are the part most homeowners get wrong on the first try. If you are unsure about the profile, or the corners will not sit flush, leave the top seal for a technician rather than forcing a strip that will gap again in a month. A threshold seal is the right addition when the floor has settled and a bottom seal alone cannot reach the concrete evenly across the full width.
Common Mistakes With Garage Door Weather Stripping
- Buying the wrong profile, so a T-end seal is ordered for a U-channel, or the reverse.
- Cutting the new seal exactly to door width, instead of leaving about 1 inch past each end.
- Skipping the channel cleaning step, so grit tears the new rubber within months.
- Stretching the seal while sliding it in, which thins it and stops it rebounding.
- Ignoring an unlevel door, a bent retainer, or a broken spring or cable that is causing the seal to fail in the first place.
- Using petroleum-based products on rubber, which degrade most seal compounds. Use silicone spray instead, two or three times a year.
What Does Garage Door Weather Stripping Cost in Hamilton, OH?
Garage door weather stripping is one of the best dollar-for-dollar maintenance jobs on a house, because the material is cheap and the job is short. The ranges below are typical U.S. ranges from competitor guides, plus this site’s overall Hamilton repair range, and they are estimates, not a quote for your door. A final price should be confirmed before work starts, especially if the retainer, floor, or door alignment also needs work.
| Job | Typical cost | Notes |
|---|---|---|
| Bottom seal, DIY materials | $15–$40 | Standard 16 to 18 foot roll, basic rubber or vinyl |
| Bottom seal, professional | $100–$250 | Parts and labour, local labour and minimum call-out drive the range |
| Full perimeter seals, professional | $250–$450 | Bottom, both sides, and top in one visit |
| Threshold seal kit | $50–$100 | Separate kit, for settled or uneven floors |
| Most Hamilton repairs overall | $120–$450 | Site’s typical Hamilton range, same-day in many cases |
Garage door weather stripping costs: estimates only, final price confirmed before work.
When to Call a Pro for Garage Door Weather Stripping in Hamilton, OH
Call a technician if the retainer is bent, rusted through, or missing fasteners, if the bottom panel is damaged, if the door is commercial or extra-wide, or if the door is unlevel, crooked, or jammed.
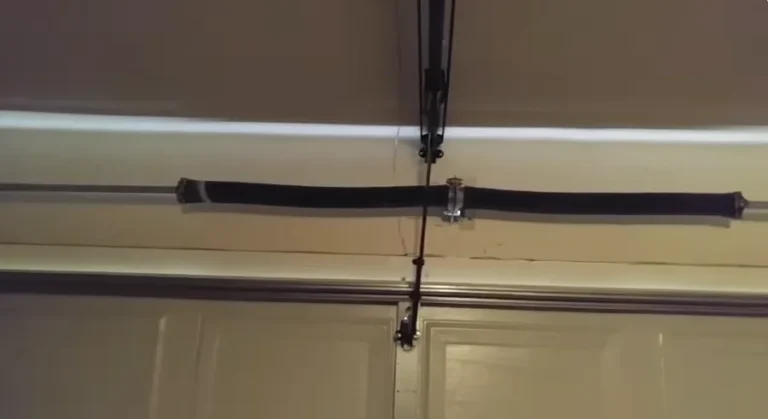
The same rule applies if you see a broken spring, a frayed cable, or a gap in the spring above the door. The U.S. Consumer Product Safety Commission warns about injuries from garage doors and their parts every year, and spring and cable work is not part of a seal job. See U.S. Consumer Product Safety Commission for garage door safety information.
Also call if the seal keeps freezing to the floor every winter, even after a new bottom seal. That pattern often needs a threshold seal, a silicone treatment each fall, or a floor and alignment check, rather than another identical bottom seal. Service covers Hamilton ZIPs 45011–45015, plus Fairfield, West Chester, Liberty Township, Fairfield Township, Middletown, Ross, Trenton, and Oxford. For a simple seal, call (513) 286-7477 and ask for the price before work, or see our garage door repair cost guide for Hamilton, OH, our garage door spring repair page, our off-track repair page, and our 24/7 emergency repair page.
How to Make New Garage Door Weather Stripping Last
A new seal will last longer if you treat it as a consumable, not a fit-and-forget part. Clean it a few times a year with a damp rag, because grit grinding into rubber is a main cause of early failure. Apply silicone spray two or three times a year to keep it flexible, and sweep slush, salt, and leaves out of the threshold in winter instead of letting them freeze under the seal. Inspect it every fall before winter and every spring after winter, and replace it at the first sign of cracking or flattening, not after it has already let water in.
Drafty Garage in Hamilton, OH Right Now?
Do not wait for the first hard freeze to find out your seal has failed. Tell us where the daylight or draft shows, and whether the door sits level, and we will connect you with a local technician who can fit the right seal.
Frequently Asked Questions
How do I know if my garage door weather stripping needs replacing?
Garage door weather stripping needs replacing if you see daylight under a closed door, feel a draft at the floor, find water or pests inside after rain, or see cracked, brittle, or flat rubber. Press the bottom seal with your thumb: if it crumbles or stays squashed, it is worn out. Any one of those signs is enough to plan a replacement before winter.
What is the bottom seal on a garage door called?
The bottom seal is also called an astragal or bottom weatherseal. It is a rubber strip that slides into a metal retainer channel on the bottom edge of the door and presses against the concrete when the door closes. Its job is to block drafts, water, dust, and pests, and to help the door close quietly and evenly.
How long does garage door weather stripping last?
Most garage door weather stripping lasts about 3 to 7 years, with quality EPDM or rubber seals often reaching 5 to 10 years. Side seals usually last longer than bottom seals, because they take less abuse. Sun, freeze-thaw cycles, road salt, and grit shorten life, so inspect seals every fall and spring, and replace them at the first sign of cracking.
Can I replace garage door weather stripping myself?
Yes, if it is a standard bottom seal swap on a level door with an undamaged retainer. Slide the old rubber out, clean the channel, and slide a matching new seal in, leaving about 1 inch past each end. Stop and call a technician if the retainer is bent, the door is unlevel, or a spring or cable looks broken, because those are not seal jobs.
Why does my garage door seal freeze to the ground in winter?
Garage door weather stripping freezes to the ground when meltwater gets under the bottom seal and refreezes overnight, gluing the rubber to the concrete. Forcing the door can tear the seal off. A threshold seal, a silicone treatment each fall, and sweeping slush out of the threshold help, and a technician should check the floor and alignment if it happens every winter.
What type of garage door weather stripping is best for Ohio winters?
EPDM rubber is a strong choice for garage door weather stripping in Ohio winters, because it stays flexible in cold weather, resists UV, and holds its shape through freeze-thaw cycles better than standard vinyl. Vinyl is cheaper but cracks faster in cold. Foam tape is only a temporary fix, and silicone seals last longest but cost more.
How much does garage door weather stripping replacement cost?
Garage door weather stripping replacement typically costs $15 to $40 in DIY materials for a standard bottom seal, or $100 to $250 professionally for the same job. A full perimeter replacement, bottom, sides, and top, typically runs $250 to $450. These are estimates only, and a final price should be confirmed before work starts in Hamilton, OH.
Should I replace side and top seals at the same time as the bottom seal?
Yes, check side and top garage door weather stripping at the same time as the bottom seal, because a fresh bottom seal does little if the frame is leaking. Side V-strip vinyl is quick to replace, about 15 minutes per side. Top seals are trickier corner work, so leave them to a technician if the corners will not sit flush.
Can a new seal fix a garage door that is not level?
No, garage door weather stripping cannot fix a door that is not level. If the daylight gap tapers from one side to the other, the problem is usually uneven cable tension or a spring out of balance, not the seal. A new seal will gap again in a short time. Stop, do not adjust cables or bottom brackets yourself, and call a technician to level the door first.
How do I stop my garage door weather stripping wearing out so fast?
Garage door weather stripping lasts longer if you clean it a few times a year, apply silicone spray two or three times a year, and sweep slush and salt out of the threshold in winter. Do not use petroleum products on rubber, because they degrade it. Inspect seals every fall before winter, and replace them at the first sign of cracking or flattening.
Conclusion: A Small Seal, a Big Winter Difference in Hamilton, OH
Garage door weather stripping is easy to ignore until the first cold night, when a draft, a puddle, or a frozen seal makes the problem obvious. Check it in 5 minutes, match the profile if you replace it, and stop at any sign of an unlevel door, a bent retainer, or a broken spring or cable. In Hamilton, OH, that small job, done before winter, keeps your garage drier, warmer, and pest-free, and it protects the door and opener from the extra strain of a leaking, freezing threshold.
If you see daylight, feel a draft, or find water inside, do not wait for it to get worse. Call (513) 286-7477, tell us where the gap shows, and get connected with a local technician who can fit the right garage door weather stripping and confirm the price before work starts.